8.2.8. Versioning (Git integration)
Database models are files, and as such they benefit from version control like any other source code. The versioning plug-in integrates Git with pgModeler, so the user can follow the history of a model, commit changes, work with branches and tags, merge the work of several people, and synchronize everything with remote repositories without leaving the tool. The plug-in works on top of the Git executable installed in your system, so Git must be installed (the path of the executable can be changed in the plug-in settings). The plug-in works with both classic models (.dbm) and split database models (.sdbm), which are the best choice when a model is handled by a team since the changes are tracked per object.
The plug-in is toggled by the Versioning button  on the bottom bar of the main window, and its panel is docked at the right side of the design view. It always refers to the model that is being edited: when the model file resides inside a Git repository, the panel shows the history of that repository; otherwise, it offers the actions that are available in that situation.
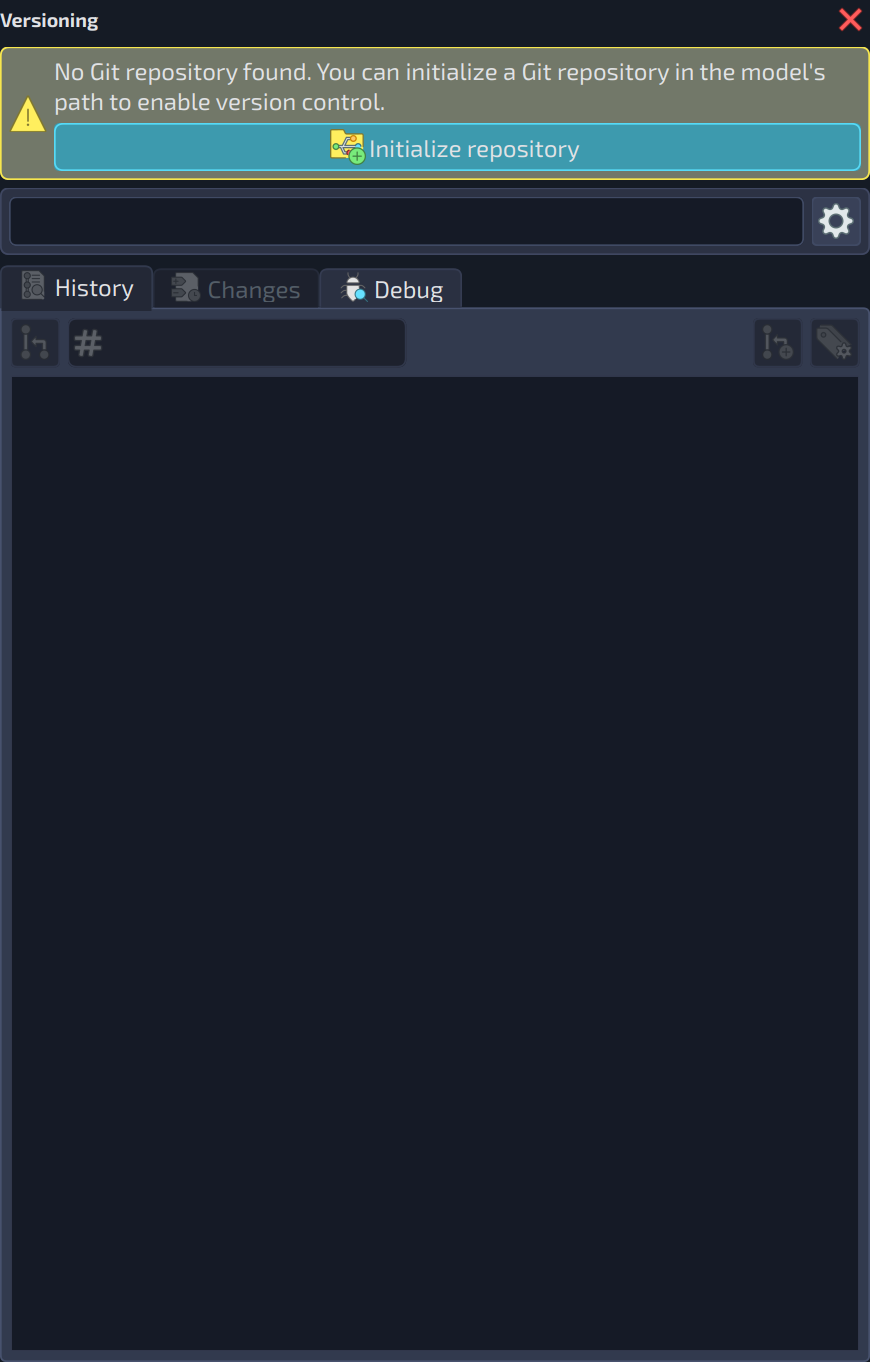
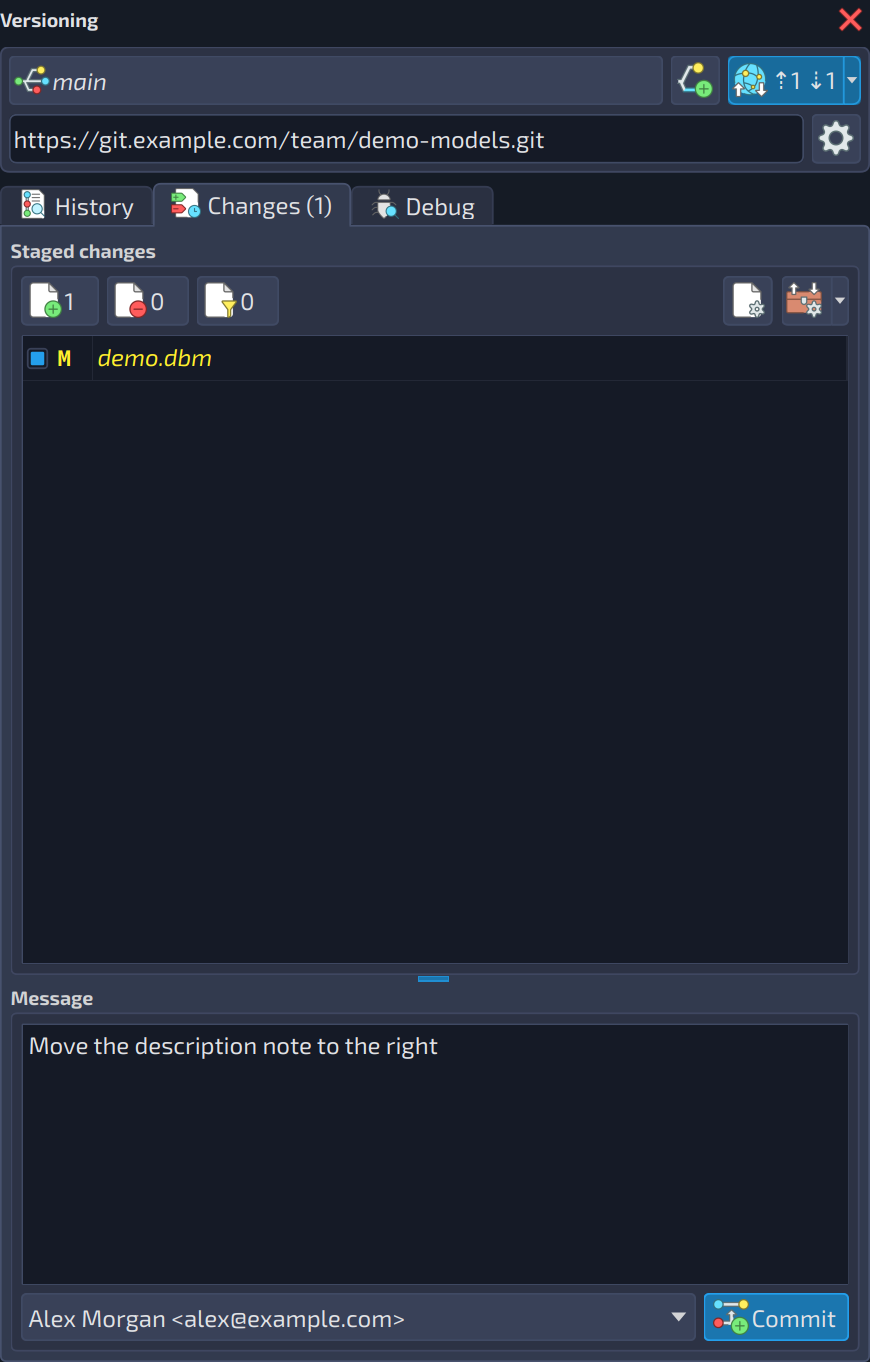
The versioning panel
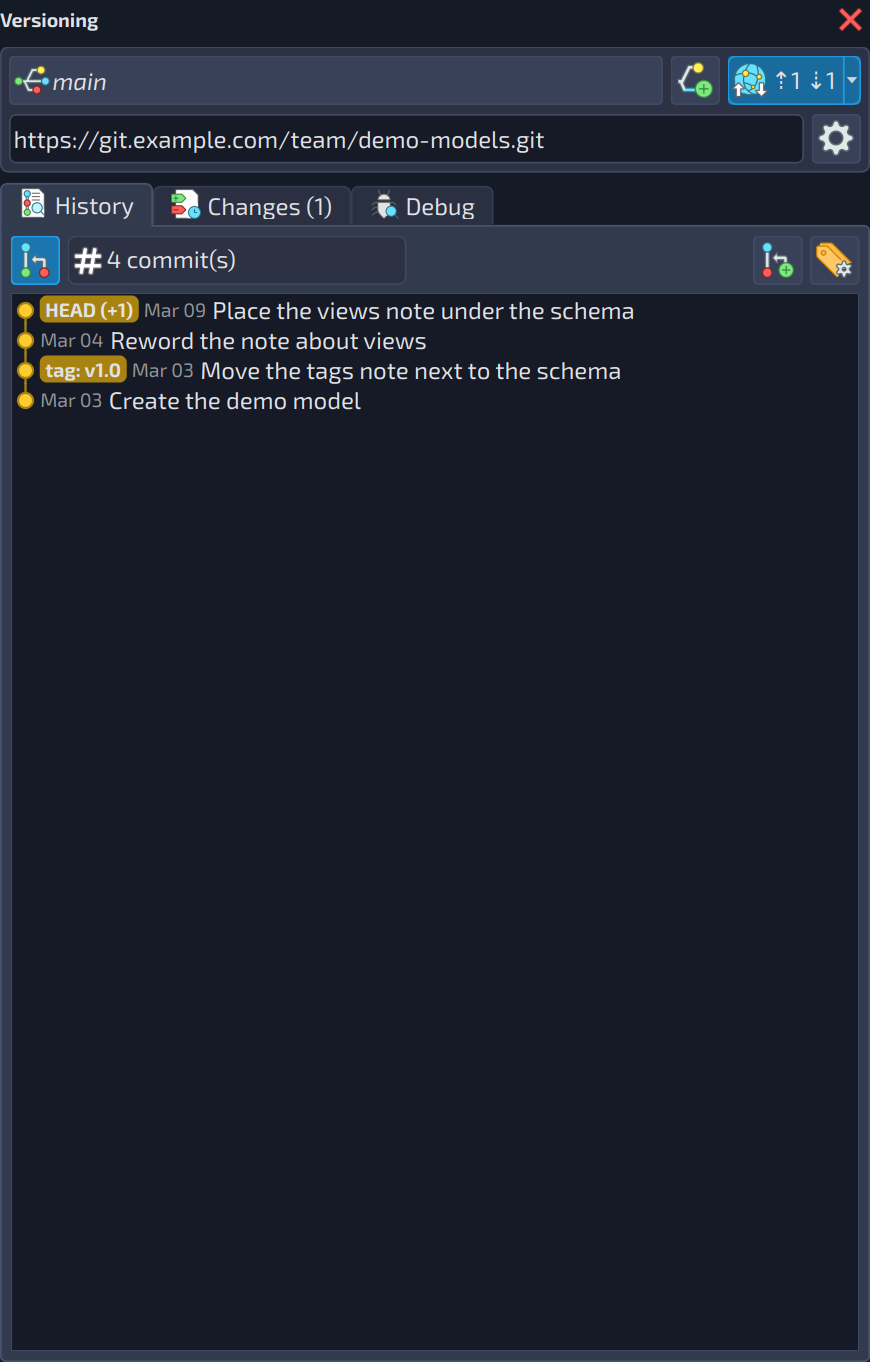
At the top of the panel, the branch button shows the current branch (click it to manage branches, see the section about branches), followed by the actions to create a branch  and to synchronize changes
  with the remote repository. The synchronize button shows how many commits are waiting to be sent (⇡) and how many are waiting to be received (⇣) from the upstream branch. Clicking the button pulls and pushes, in this order, while its menu allows you to run only the pull (Pull only) or only the push (Push only).
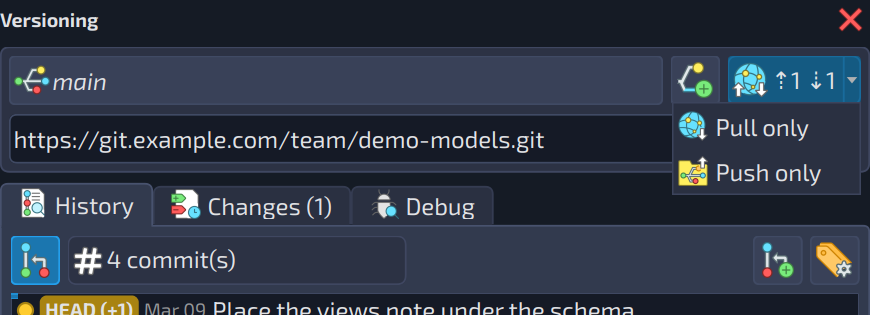
Below the branch there is the remote URL of the repository and the button  that opens the plug-in settings. The rest of the panel is organized in three tabs: History, where the commits of the current branch are listed; Changes, used to stage and commit the modifications of the model; and Debug, which displays the Git commands executed by the plug-in and their output, useful to understand what happened when an operation fails.
If the model is not in a repository yet, the panel shows the button Initialize repository  , which creates a Git repository in the model's folder. When the model file resides under a repository but is not tracked, or is ignored by a
 .gitignore file, a message informs that. The panel also warns when the repository is in detached HEAD state, since the commits created in this state are orphaned and hard to recover, and when it is in a merge conflict state (see the section about conflicts).
Commit history
The History tab lists the commits of the current branch, from the most recent one. Each entry shows the commit date and message; the commit the repository is at is flagged with HEAD, and the commits that are tagged or pointed to by a branch show a badge with the name of the reference. When a commit has more than one reference, the badge displays the first one followed by the number of the others, like HEAD (+1). The button Merges visible/hidden 
 toggles the display of merge commits and, next to it, the panel shows the number of commits loaded.
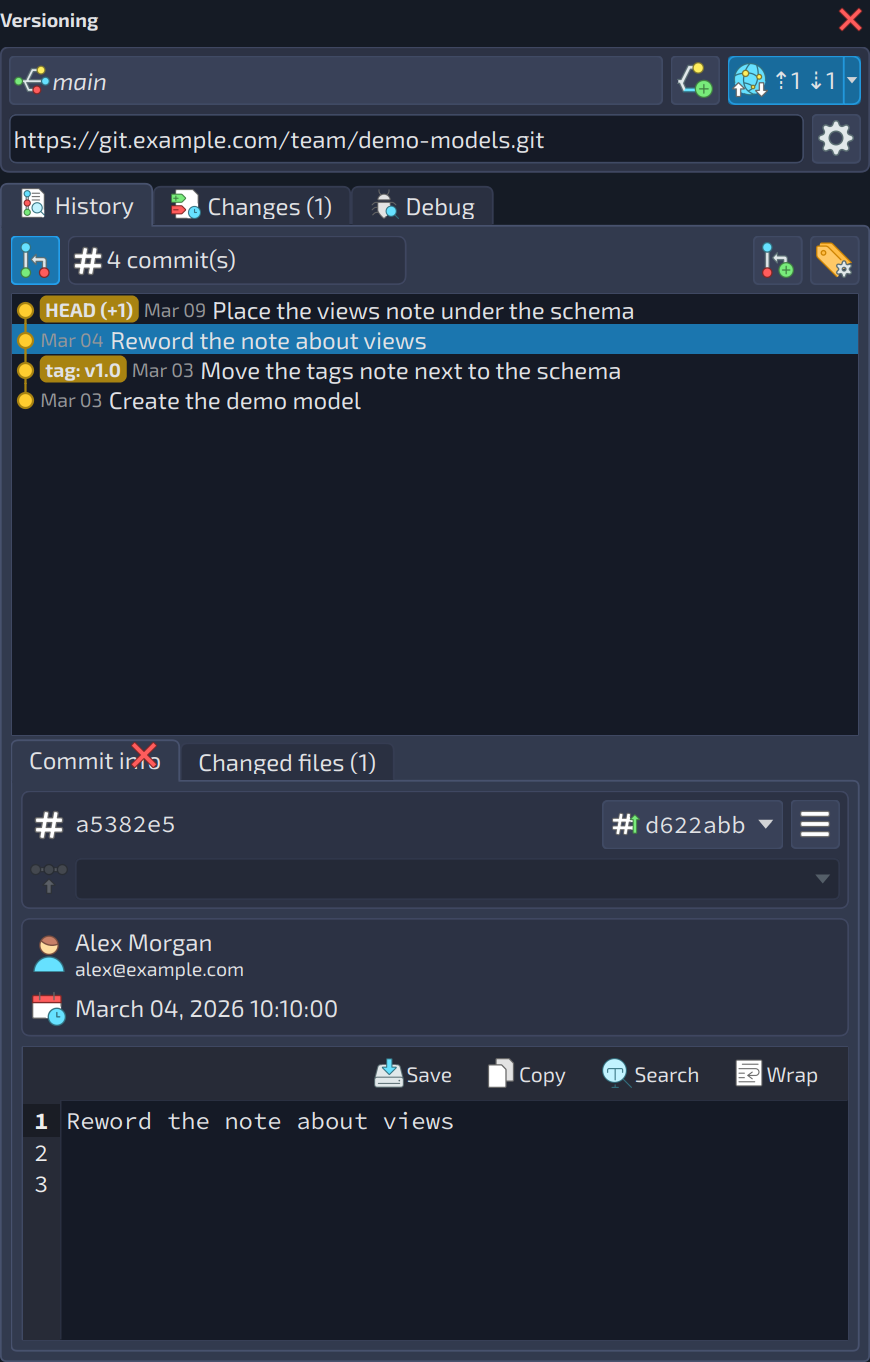
Double-clicking a commit toggles the commit information panel below the list. The first tab, Commit info, shows the full hash of the commit, its parent commits and the references that point to it (branches and tags), the author and the date, and the complete message. In the second tab, Changed files, the files modified by the commit are listed.
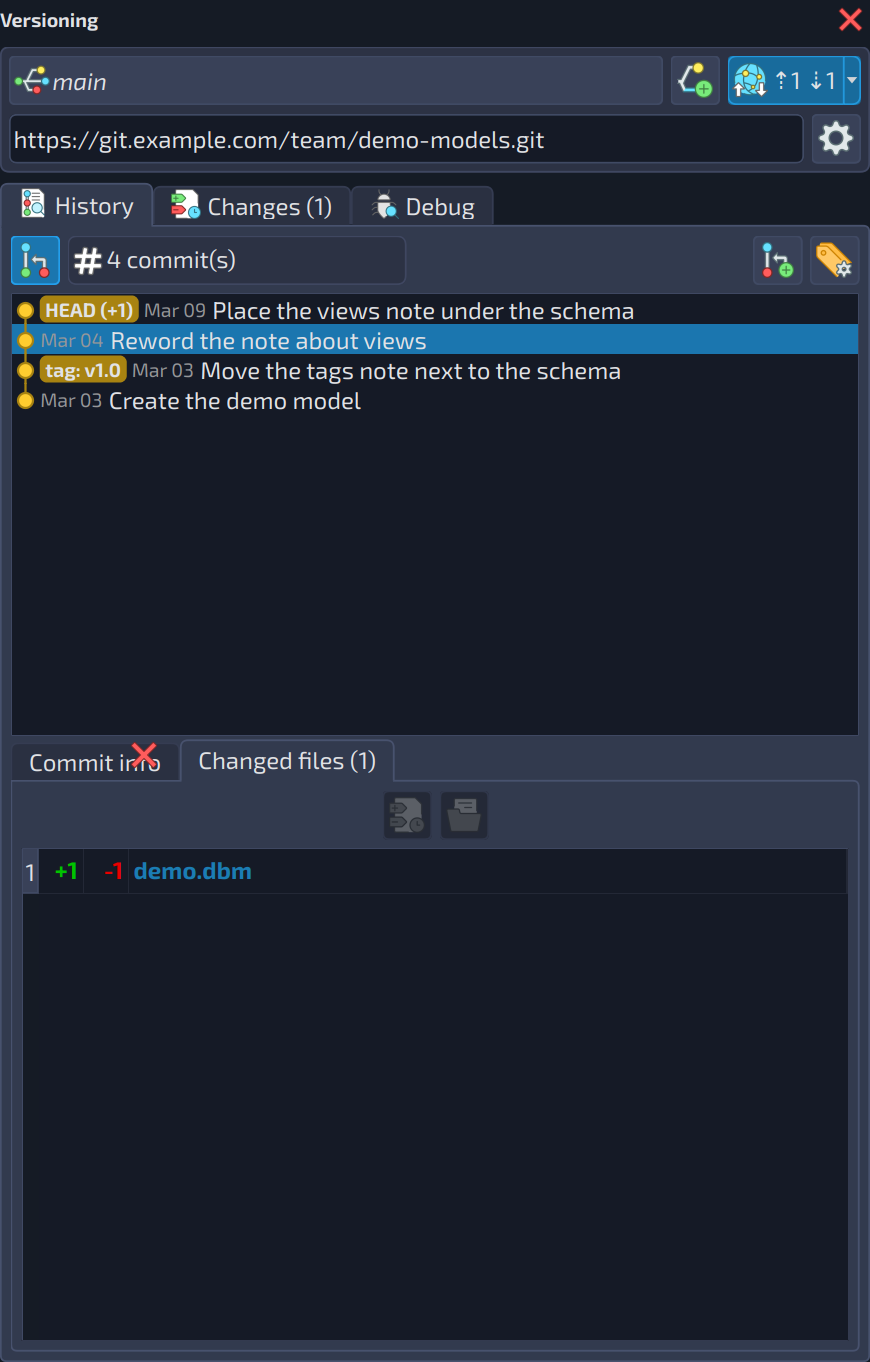
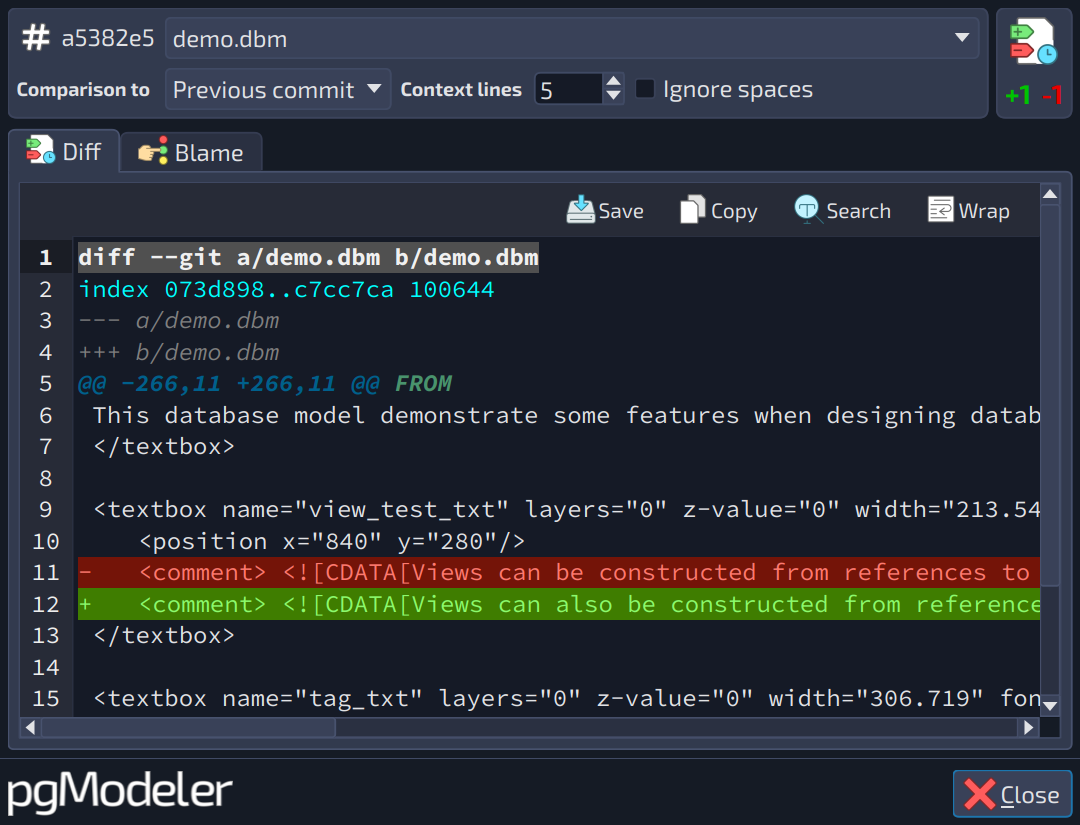
To inspect what changed in a file, select it in the list and use the action Open diff/blame dialog. The dialog has two tabs: Diff, the lines added and removed by the commit (colored in green and red), and Blame, which shows who last modified each line. In the header of the dialog you can choose the file, what the comparison is made against (Previous commit, HEAD, or Local changes), the number of Context lines shown around each change, and whether spaces are ignored in the comparison.
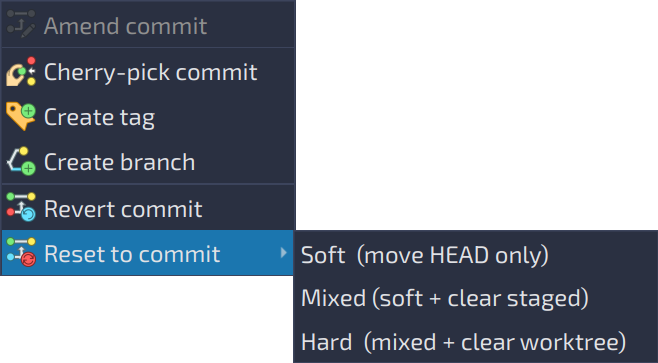
Right-clicking a commit opens a menu with the operations that can be performed over it:
-
Amend commit: edits the message (and the staged changes) of the last commit. Only available for the commit at the head of the current branch.
-
Cherry-pick commit: applies the changes of the commit on another branch (see the section about cherry-picking).
-
Create tag: tags the commit (see the section about tags).
-
Create branch: creates a branch whose starting point is the commit.
-
Revert commit: creates a new commit that undoes the changes of the selected one.
-
Reset to commit: moves the current branch to the selected commit. In Soft mode only the branch pointer is moved; Mixed also clears the staged changes; and Hard also discards the changes in the working folder. The hard reset is a destructive operation, so pgModeler asks for a confirmation before running it.
Committing changes
The Changes tab lists the files of the repository that were modified, created, or deleted since the last commit. By default, only the files related to models (.dbm, .sdbm, .xml, and .dbo) are tracked; additional file types can be defined in the plug-in settings. The three counters over the list show the number of staged files (included in the next commit), unstaged files, and filtered files (hidden because they are ignored or not tracked). Clicking the counters of staged  and unstaged
  files stages or unstages all files at once, and each file can be staged by checking it in the list.
To create a commit, stage the files, type the commit message, choose the committer and click Commit  . Nothing is committed until the button is pressed.
The menu next to the counters offers a few more operations over the files:
-
Show ignored: toggles the display of the files ignored by
.gitignore. -
Restore: discards the local changes of all files or only of the selected ones, reverting them to their state in the last commit. Since the changes are lost, pgModeler asks for confirmation.
-
Push to stash / Pop from stash / Apply stash: the stash is a shelf where the local changes can be temporarily saved so the working folder returns to the state of the last commit. Push to stash saves all changes (or only the selected ones), Pop from stash restores the most recent saved changes and removes them from the shelf, and Apply stash restores them keeping the entry in the stash.
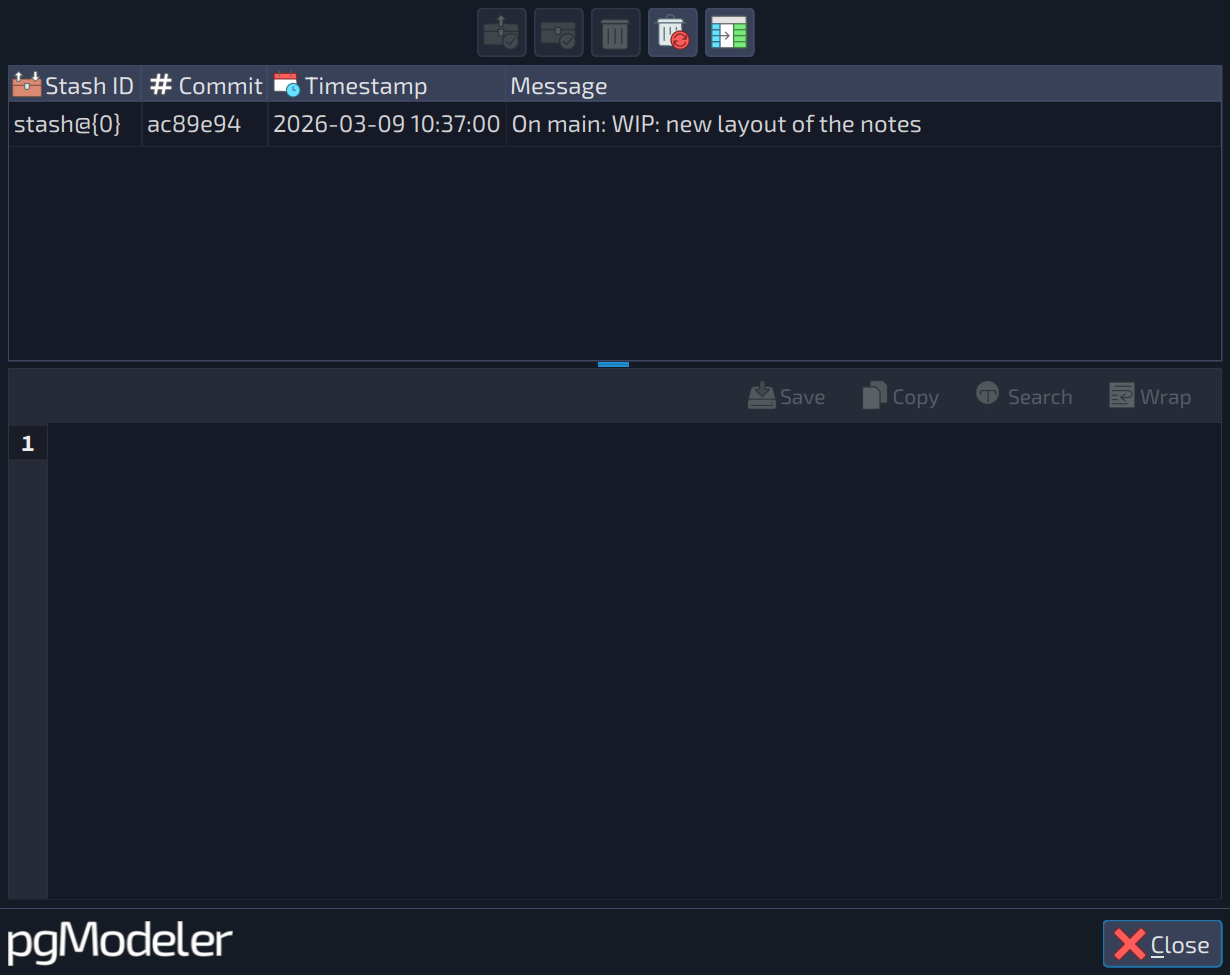
The button Manage stash  opens the list of the stash entries, each one with its ID, the commit it was created on, the timestamp, and the message. From there it is possible to apply an entry (keeping or removing it from the stash) and to delete one or all entries.
When the amend operation is chosen in the commit menu, the Changes tab enters the amend mode: the message of the last commit is loaded and the buttons Amend  and Cancel
  replace the Commit button.
Branches
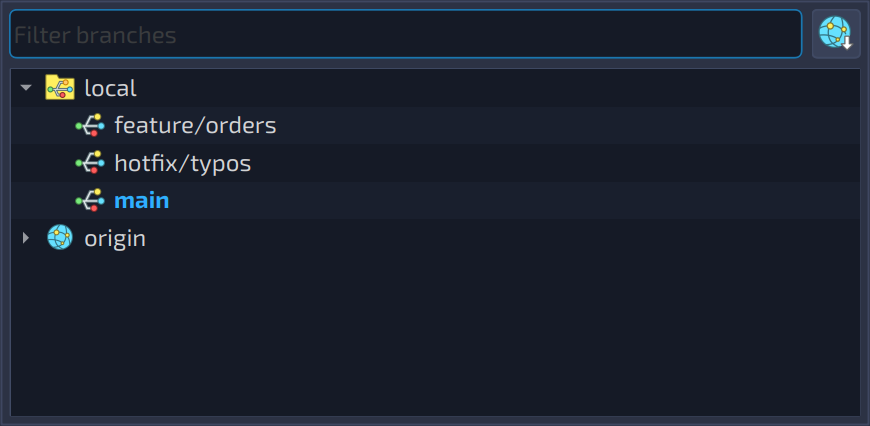
Clicking the branch button of the panel displays the list of local and remote branches of the repository. Each branch has its own buttons: Checkout branch (Shift+C), Delete branch (Del), and Set as upstream of the current branch (Shift+U). The field at the top filters the list, and the button next to it fetches the information from the remote repository: the menu offers Fetch only (F5) and Prune and fetch (Ctrl+F5), which also removes the references to branches that were deleted in the remote. Checking out a remote branch directly causes the repository to enter the detached HEAD state, so pgModeler asks if a local branch must be created instead.
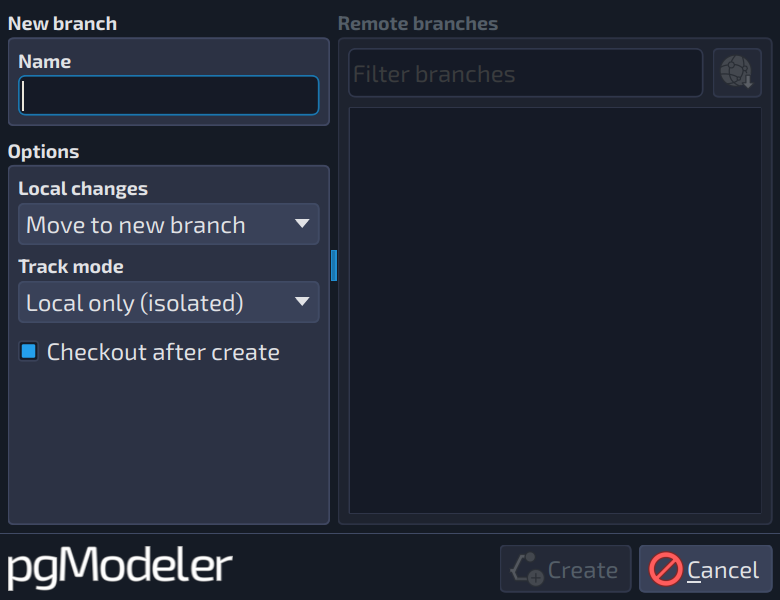
To create a branch, use the Add button next to the branch button. In the form, type the name of the new branch and, optionally, choose its parent commit (the current one by default). In the group Options you decide what happens with the local changes (Move to new branch or Move to stash), the track mode (Local only (isolated), Synchronized (track), or Copy only (no track)), which defines whether the new branch is linked to a remote branch, and whether the new branch is checked out after being created.
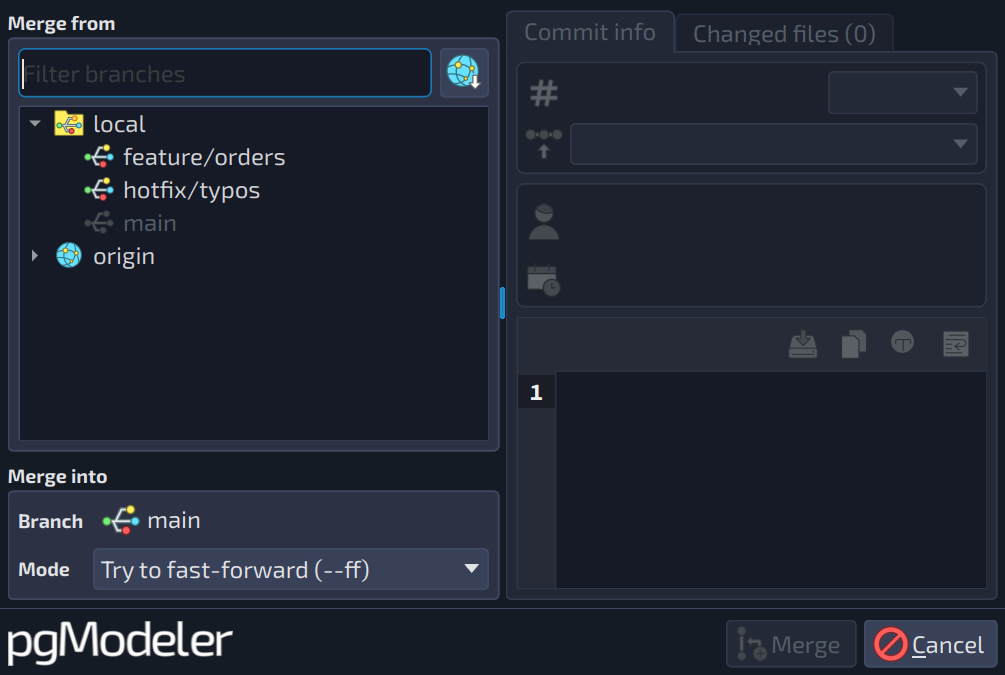
The Merge branch button  , in the bar above the commit list, opens the merge form. Select, in Merge from, the branch to be merged into the current branch (Merge into, shown in the form) and choose the mode:
-
Try to fast-forward (
--ff): just moves the branch pointer when possible and creates a merge commit otherwise. -
Create merge commit (
--no-ff): always creates a merge commit. -
Fast-forward only (
--ff-only): the merge is aborted when a fast-forward is not possible. -
Squash commits (
--squash): applies all the changes of the source branch as a single set of staged changes, without creating a merge commit.
Cherry-picking commits
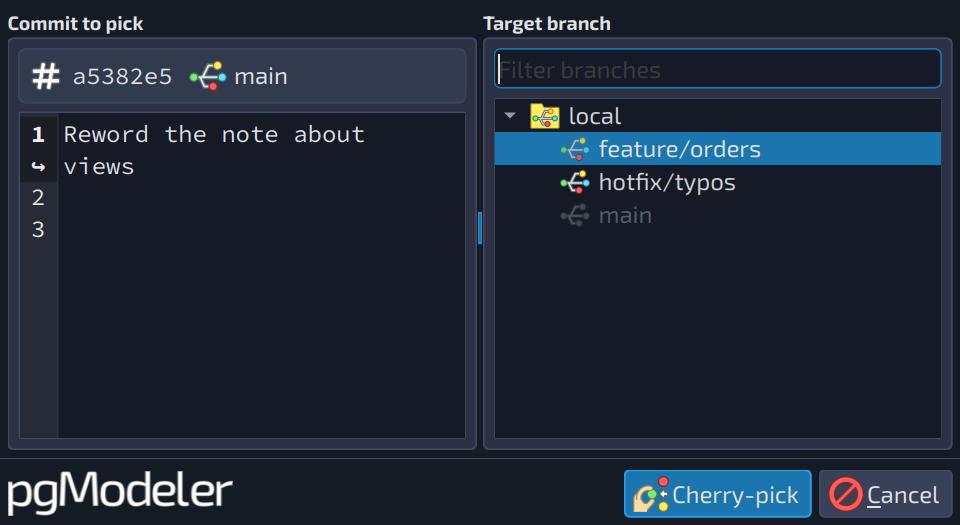
The Cherry-pick operation applies the changes of a single commit on another branch, without merging the whole branch. To use it, right-click the desired commit and choose Cherry-pick commit. In the form, the left side shows the commit to pick (its hash, the branch where it is, and its full message) and the right side lists the local branches as the target branch; the field above the list filters the branches. The current branch cannot be the target, so it is listed as unavailable. Select the target branch and click Cherry-pick  to apply the commit on it. If the operation fails (for instance, because of conflicts), pgModeler shows the error and returns to the branch that was checked out before.
Tags
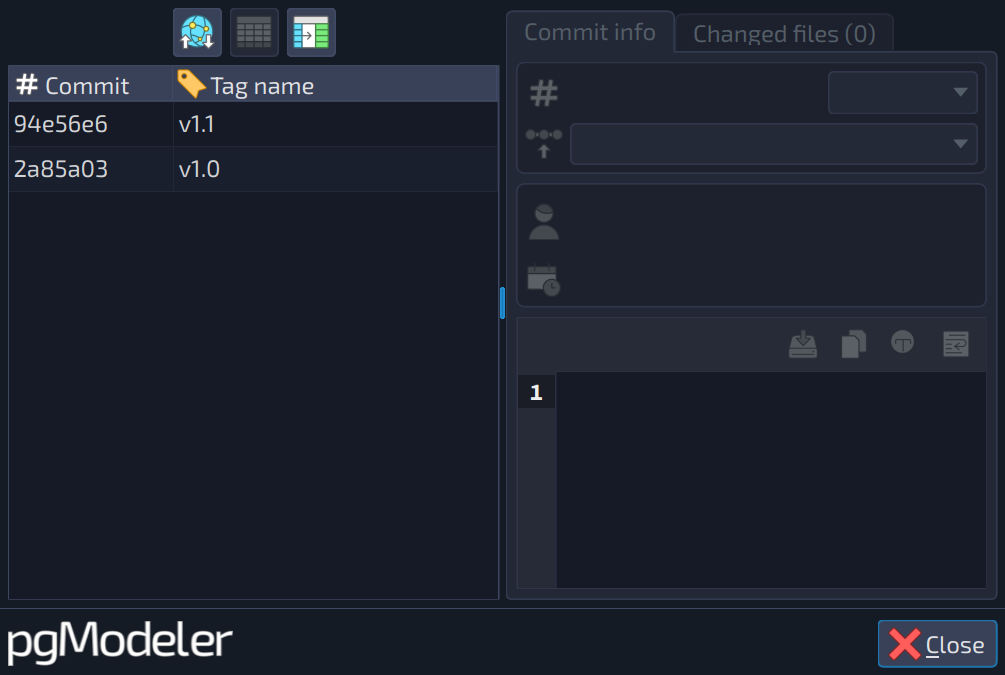
Tags mark important points of the history, like the releases of a model. A tag is created from the commit menu (Create tag) by informing the tag name for the selected commit. The button Manage tags  opens the list of all tags, showing the commit each one points to and its name. From that dialog the tags can be synchronized with the remote repository. Since this operation can affect the repositories of the other developers, pgModeler asks for confirmation before running it. The tags can also be synchronized automatically, see the Tags auto synchronization option in the plug-in settings.
Merge conflicts
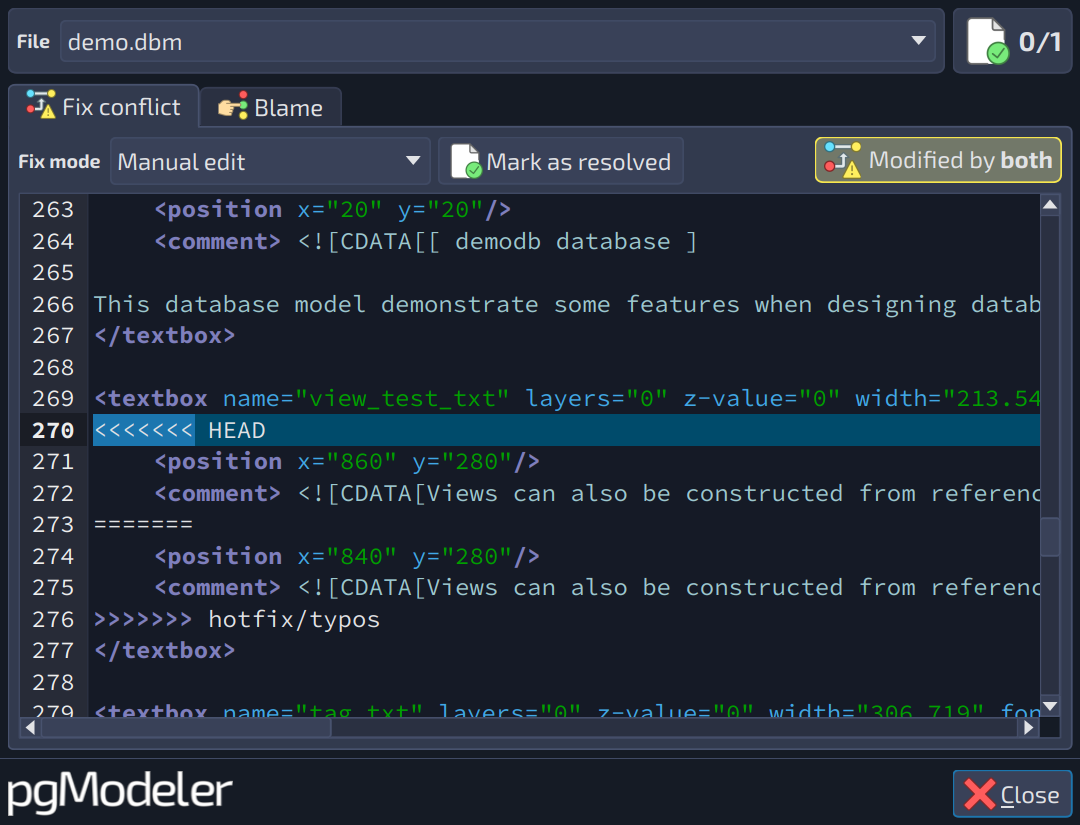
When a merge (or a pull) cannot be completed automatically because the same part of a file was changed on both sides, the repository enters the merge conflict state. In this state, the panel displays the buttons Resolve conflict  and Revert state
  , and the model is locked for editing and the features that could modify it (import, diff, and the manage view) are disabled until the conflict is solved or reverted. Revert state returns the repository to the state it was before the merge. Resolve conflict opens the diff dialog for the conflicting files, where the Fix mode defines how each file is solved: Manual edit, Keep local changes, Accept incoming changes, or Revert to base. After the problem is fixed, the file must be marked as resolved (Mark as resolved
  ). When there are no more conflicting files, click Continue
  in the Changes tab to confirm the merge.
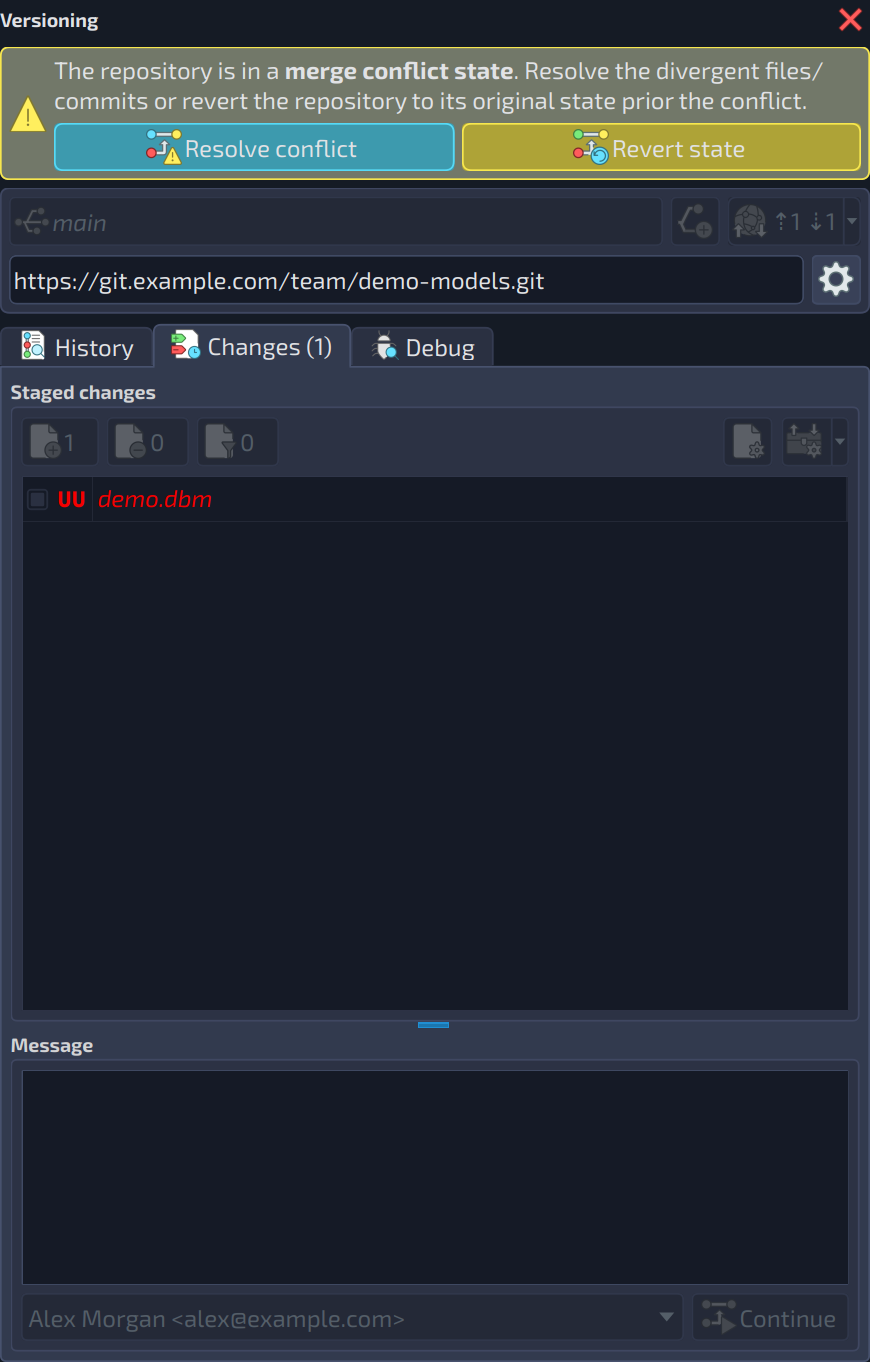
The dialog opened by Resolve conflict lists the conflicting files and shows, in the Fix conflict tab, the content of the file with the conflict markers (<<<<<<<, =======, and >>>>>>>) that Git inserted around the divergent parts, so they can be fixed there or by one of the Fix mode options.
When the model file is modified by another process (for example, after a pull or a checkout of another branch), pgModeler asks if the model must be reloaded from the filesystem.
Plug-in settings
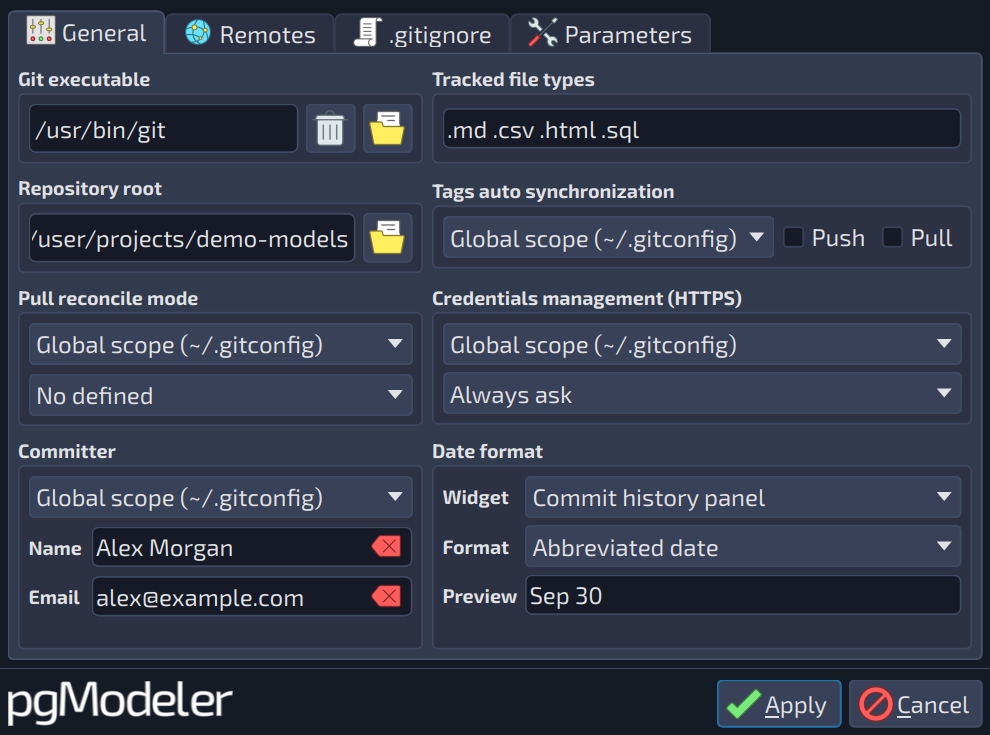
The settings of the plug-in are opened by the gear button of the panel. The first tab, General, has the following options:
-
Git executable: the path of the Git program. When empty, pgModeler looks for it in the system's path.
-
Tracked file types: extra file types, besides the model files, that are listed in the Changes tab (for example,
.md .csv .html .sql). -
Repository root: the root folder of the repository the current model belongs to.
-
Tags auto synchronization: the scope where the setting is saved (global, in
~/.gitconfig, or local, in.git/config) and the options Push and Pull, which make pgModeler send and receive the tags automatically when the repository is synchronized. -
Pull reconcile mode: what Git does when the local and the remote branches diverged during a pull: Merge, Rebase, Fast-forward only, or No fast-forward. When no mode is defined, the Git default is used.
-
Credentials management (HTTPS): how the credentials of HTTPS remotes are handled: Always ask, Cache in memory, Store in local file (unsafe), Git Credential Manager, and, according to the system, Linux password vault or MacOS Keychain.
-
Committer: the name and the e-mail used in the commits, saved either in the global or in the local scope of the Git configuration.
-
Date format: how the dates are displayed in the commit history panel, in the commit info panel, and in the blame log lines: ISO date only, ISO date and time, relative date, abbreviated date, extended abbreviated date, and full date and time. The field Preview shows an example of the selected format.
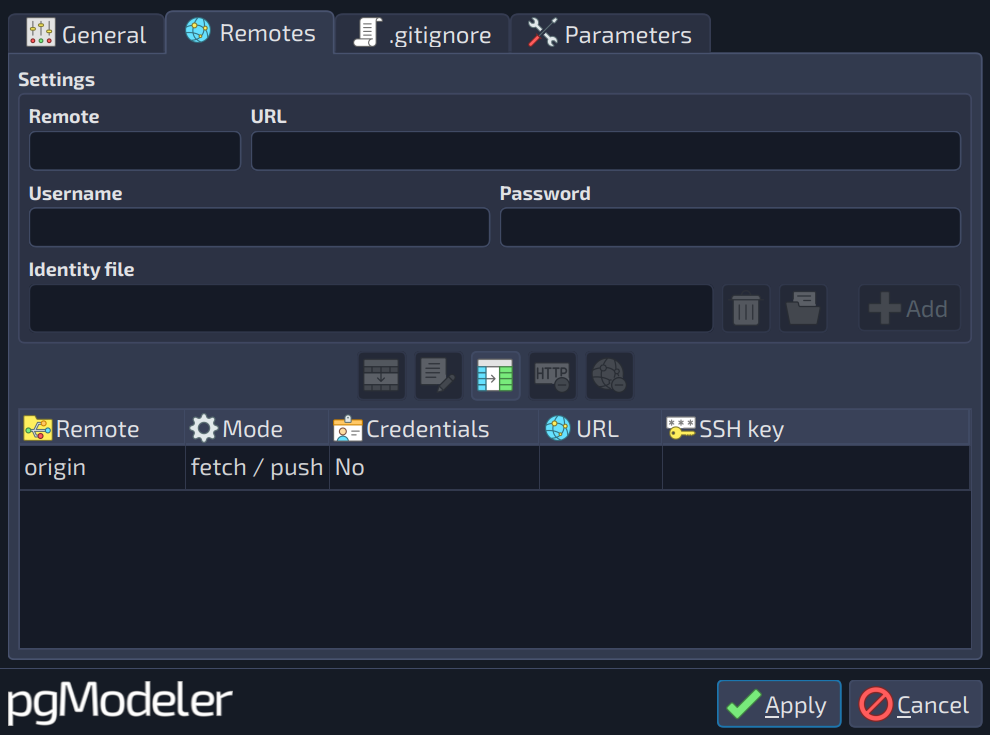
The tab Remotes manages the remote repositories: the name (Remote), the URL, and the credentials used to access it (Username, Password, or an Identity file for SSH). The tab .gitignore shows the content of the .gitignore file of the repository, where the files that must not be tracked are listed; when the repository does not have one, you can type its content and apply it to create the file.
Cloning a repository
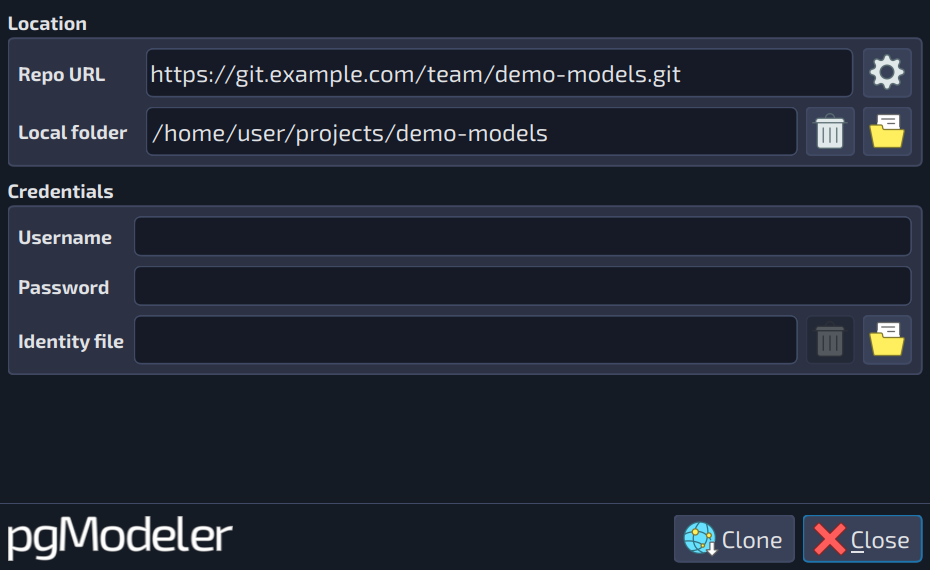
To start working with a model that already exists in a remote repository, use the button Clone repo  at the welcome view of pgModeler. In the form, inform the Repo URL and the Local folder where the repository will be created. If the remote requires authentication, fill the Credentials group with the Username and Password or select an Identity file (SSH key). The options of the clone are:
-
Default remote and Default branch: the name given to the remote and the branch that is checked out after the clone.
-
Clone submodules: also clones the repository's submodules.
-
Single branch: clones only the history of one branch.
-
Clone depth: limits the clone to a number of the most recent commits (a shallow clone).
-
Load models after clone: when the clone finishes, pgModeler lists the model files of the repository so they can be loaded.